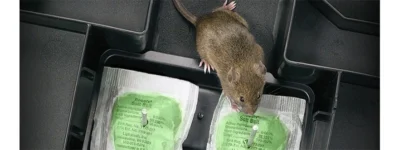
Discovering evidence of mice in your home isn’t just unpleasant – it can pose serious health risks. Mouse urine, droppings, nests, and even deceased mice can spread disease and create lingering odors. This comprehensive guide will walk you through safely and effectively cleaning up after a mouse infestation, with specific attention to eliminating odors, removing droppings, and properly disposing of nests and carcasses. Once you’ve addressed the immediate clean-up, it’s also vital to implement strategies to prevent future infestations. This guide will provide insights on how to eliminate mice from home, ensuring that your space remains rodent-free. By following these steps, you can maintain a healthier environment and enhance your peace of mind.
- Understanding the Health Risks of Mouse Contamination
- Essential Safety Equipment for Mouse Cleanup
- How to Safely Remove Dead Mouse Smell
- How to Clean Mouse Urine and Eliminate the Smell
- Safe Removal and Disposal of Mouse Droppings
- Proper Removal and Disposal of Mouse Nests
- Special Situations: Vehicles and HVAC Systems
- When to Call Professional Help
- Preventing Future Mouse Problems
- Frequently Asked Questions
Understanding the Health Risks of Mouse Contamination

Before attempting any cleanup, it’s important to understand that mouse-related materials can transmit several serious diseases. Mouse droppings, urine, saliva, and nesting materials may contain harmful pathogens that cause illnesses like Hantavirus Pulmonary Syndrome, Salmonellosis, and Leptospirosis.
According to the Centers for Disease Control and Prevention (CDC), mice can spread over 35 diseases worldwide, making proper cleanup essential not just for comfort but for health protection.
Essential Safety Equipment for Mouse Cleanup
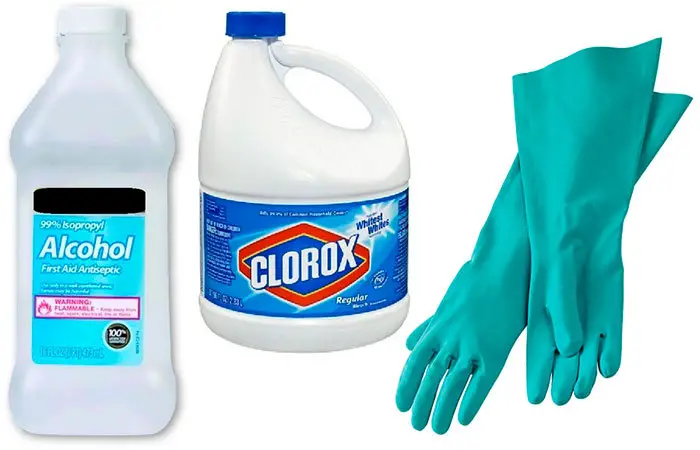
Before beginning any mouse-related cleanup, gather these necessary supplies to protect yourself:
How to Safely Remove Dead Mouse Smell

The distinctively unpleasant odor of a dead mouse can permeate your entire home, particularly if the carcass is hidden within walls, under floorboards, or in ventilation systems.
Identifying Dead Mouse Odor
A dead mouse produces a characteristic smell that changes as decomposition progresses:
- Initial stage: Sulfur-like smells are often the first indicator of a dead mouse.
- Mid-decomposition: Methane odors similar to natural gas or chemical thinners become prominent.
- Advanced decomposition: Noxious gases reminiscent of rotten food or soil become more noticeable as the process speeds up.
Location and Removal of the Dead Mouse
- Identify the location Follow the odor to its strongest point. Pets often help detect the exact location, or you may notice the smell intensifies when running heating or cooling systems if the carcass is in ductwork.
- Access the area If the mouse is inside a wall, you may need to create a small access hole once you’ve pinpointed the location. A borescope (flexible camera) can help confirm the exact position before cutting.
- Remove the carcass Wearing gloves and a mask, carefully remove the dead mouse and place it immediately in a sealed plastic bag. Double-bag for added protection.
- Disinfect the area Thoroughly clean the affected area with a 10% bleach solution. Allow it to sit for 10-15 minutes before wiping clean with paper towels.
- Dispose properly Place all contaminated materials in sealed bags and put them in an outdoor trash container with a tight-fitting lid.
After removing a dead mouse, expect the smell to dissipate within a few days. If the carcass couldn’t be located, natural decomposition will eventually eliminate the odor, though this process can take 2-4 weeks depending on temperature and humidity levels.
Odor Elimination Products
When a dead mouse can’t be immediately located or removed, or after removal to speed up deodorization, consider these commercial products:
- Earth Care Odor Removing Bags – These can be placed in vents, attics, or crawl spaces to absorb odors quickly.
- Rat Sorb Odor Eliminator – Applied to cotton balls and placed near the odor source, this liquid is specifically formulated for rodent odors.
- Nature’s Miracle Odor Control – Though designed for pet odors, these work well for mouse odors in contained spaces.
- Activated charcoal – A natural alternative that effectively absorbs odors when placed near the affected area.
Earth Care Odor Removing Bags
Best for Dead Mouse Odor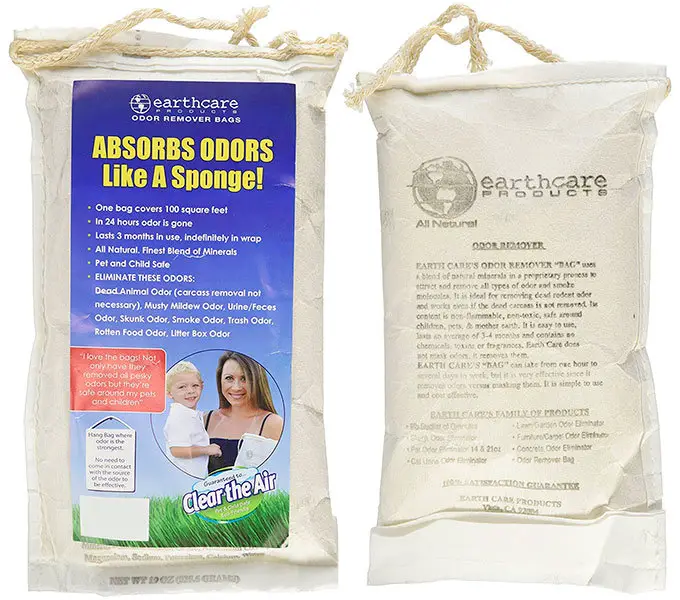
How Does It Work
How to Use
- Place bags near the source of odors, such as in attics, crawl spaces, or near walls where dead mice may be located
- For intense odors, use multiple bags in the affected area
- Bags remain effective for up to 3 months under normal conditions
- No need to open the bags - they work through the special breathable packaging
- Non-toxic and safe for use around children and pets
- Effective against even the strongest dead rodent odors
- Works without masking odors with fragrances
- No need to locate and remove the dead animal in inaccessible areas
- Long-lasting performance of up to 3 months per bag
- May take 24-48 hours to fully eliminate strong odors
- Less effective in very large, open spaces without proper placement
- Higher cost than some DIY solutions
How to Clean Mouse Urine and Eliminate the Smell
Mouse urine contains ammonia which creates a distinctive and unpleasant odor. As urine breaks down, the ammonia concentration increases, leading to stronger smells and potential respiratory irritation.
Identifying Mouse Urine
Mouse urine often leaves these telltale signs:
- A strong ammonia-like smell that intensifies in enclosed spaces
- A nose-burning sensation when approaching areas with high concentrations
- White, chalky deposits or stains when dried (due to high calcium content)
- Fluorescence under UV/blacklight (urine will glow)
Step-by-Step Urine Cleanup Process
- Ventilate the area Open windows and doors to increase air circulation before beginning cleanup.
- Prepare cleaning solution Mix a disinfectant solution of 1 part bleach to 10 parts water. For delicate surfaces, a mixture of equal parts white vinegar and water can be effective.
- Thoroughly clean affected areas Saturate the contaminated surface with the cleaning solution and allow it to soak for 10-15 minutes before wiping with paper towels.
- Deep clean fabrics and carpets For affected upholstery or carpeting, use an enzymatic cleaner designed for breaking down biological materials, followed by steam cleaning if possible.
- Apply odor neutralizers After cleaning, use commercial odor eliminators or natural alternatives like baking soda or activated charcoal to absorb remaining odors.
Enzymatic Odor Eliminator Spray
Best for Urine Odors
How Does It Work
How to Use
- Test on an inconspicuous area before wide application
- Saturate the affected area thoroughly with the spray
- Allow to dwell for 10-15 minutes to break down organic matter
- For severe contamination, cover with a damp cloth to slow evaporation and allow enzymes to work longer
- Blot with clean cloth or allow to air dry
- Repeat application for severe cases or set-in odors
- Eliminates odors completely rather than masking them
- Safe for use on most surfaces including carpet, upholstery, and wood
- Non-toxic and safe around pets and children when used as directed
- Effective against old, set-in urine odors other products can't touch
- Concentrated formula provides excellent value
- May require multiple applications for severe contamination
- Works more slowly than chemical alternatives
- Not as effective on porous surfaces without sufficient saturation
Avoid using vinegar directly on leather as it can cause damage. Instead, mix 1/2 cup olive oil with 1/4 cup vinegar and apply with a spray bottle for a gentler solution that won’t harm leather surfaces.
Natural Odor Absorbers for Lingering Smells

After thorough cleaning, these natural options can help eliminate residual odors:
Baking Soda
Place open containers in affected areas or sprinkle directly on carpets (let sit overnight before vacuuming).
Coffee Grounds
Unused coffee grounds in small bowls throughout the affected area can absorb odors effectively.
Activated Charcoal
Highly effective at absorbing odors, place in shallow dishes near problem areas.
Citrus Peels
Fresh lemon, orange, or lime peels can help neutralize and mask unpleasant odors.
Safe Removal and Disposal of Mouse Droppings
Mouse droppings pose significant health risks and should never be swept, vacuumed, or handled with bare hands, as these actions can release dangerous pathogens into the air.
Identifying Mouse Droppings
Mouse droppings have specific characteristics that distinguish them from other rodent waste:
- Shape: Granular and rice-like, typically tapered at one or both ends
- Size: Small, approximately 1/8 to 1/4 inch in length
- Color: Initially brown and soft, turning dark and hard after several hours, eventually becoming gray
- Distribution: Usually scattered rather than concentrated in one area
CDC-Recommended Procedure for Cleaning Droppings
Special Considerations for Different Surfaces
Different areas require specific cleaning approaches:
- For carpets and upholstery: After removing droppings, use a steam cleaner or carpet shampooer to deep clean the area.
- For kitchen surfaces: Pay special attention to food preparation areas. After disinfecting, use food-safe cleaners for final cleaning.
- For enclosed spaces: Use a flashlight to ensure all droppings are located and removed, especially in dark corners, behind appliances, and in cabinets.
Proper Removal and Disposal of Mouse Nests
Mouse nests can harbor disease-causing organisms and parasites, making safe removal crucial for health protection.
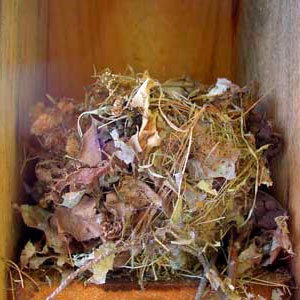
Identifying Mouse Nests
Unlike the neat, structured nests of birds, mouse nests are typically:
- Disorganized piles of shredded materials about a foot in diameter
- Composed of various materials like insulation, paper, string, fabric, or fiberglass
- Usually featuring a small entrance hole
- Often surrounded by droppings, indicating active use
Common Nesting Locations
Mice typically build nests in areas that provide warmth, protection, and proximity to food sources:
Inside Walls
Access gained through small holes in baseboards or drywall
Attics & Crawl Spaces
Quiet, undisturbed areas perfect for nesting
Behind Appliances
Especially those generating heat like refrigerators and ovens
Kitchen Cabinets
Particularly lower cabinets used less frequently
Inside Furniture
Upholstered furniture provides nesting materials and shelter
Vehicle Engines
Warm and protected from predators
Safe Nest Removal Procedure
The Humane Society recommends these steps for safely removing mouse nests:
- Prepare for removal Put on protective gear including gloves, a face mask or respirator, and clothing that can be washed immediately after the task.
- Approach cautiously Be aware that mice may still be in the nest. Approach quietly and be prepared for mice to scatter when disturbed.
- Transfer to container Quickly place the entire nest into a bucket or sturdy bag to contain any mice that might be inside.
- Secure and dispose If the nest contains live mice and you prefer not to kill them, transport them at least 1 mile from your home before release. Otherwise, treat the nest as biohazardous waste.
- Disinfect the area After removing the nest, thoroughly disinfect the area with a 10% bleach solution. Let it soak for 10-15 minutes before wiping clean.
- Address entry points Identify and seal any holes or gaps that allowed mice access to the nesting location.
The CDC advises that mouse nests can contain hantavirus, which can cause a potentially fatal respiratory disease. Always wear appropriate protective gear and avoid creating dust when handling nests.
Special Situations: Vehicles and HVAC Systems
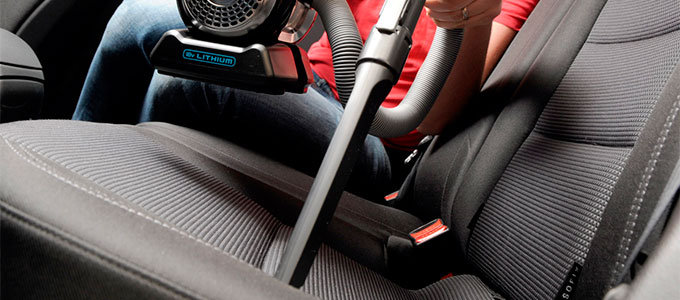
Removing Mouse Odors from Vehicles
Vehicles provide warm, sheltered spaces attractive to mice, and cleaning up after an infestation requires special attention:
Dealing with Mice in HVAC and Ventilation Systems
When mice infest heating, ventilation, or air conditioning systems, the problem requires specialized attention:
- Turn off the system before beginning any inspection or cleaning to prevent spreading contaminants throughout the home.
- Remove accessible vent covers and check for signs of mice near the openings.
- Use a dehumidifier in your home to lower humidity, which can help speed up decomposition if a dead mouse cannot be located.
- Place odor absorbers near vents if the smell persists after cleaning.
- Consider professional duct cleaning for extensive contamination or if the problem persists after your efforts.
When to Call Professional Help
While many mouse-related cleanup tasks can be handled personally with proper precautions, certain situations warrant professional assistance:
Professional remediation services typically range from $150 to $500 depending on the extent of the problem and your location. While this represents a significant investment, it can prevent health risks and ensure complete elimination of the problem.
Preventing Future Mouse Problems
After cleaning up a mouse infestation, the EPA recommends these steps to prevent recurrence:
- Seal entry points Inspect your home’s exterior for holes as small as a dime and seal them with steel wool, copper mesh, or caulk. Pay special attention to areas where pipes or wires enter the building.
- Remove food sources Store food in airtight containers, clean up crumbs promptly, and don’t leave pet food out overnight.
- Reduce clutter Minimize storage of boxes, papers, and fabric that mice can use for nesting materials.
- Maintain yard Keep grass short, trim vegetation away from your foundation, and store firewood at least 20 feet from your home.
- Set up a monitoring system Place traps in strategic locations and check them regularly to catch any new mice before they establish a population.
Frequently Asked Questions
How long will dead mouse smell last?
After removing a dead mouse, the odor typically dissipates within 3-5 days. If the mouse cannot be removed (e.g., inside a wall), the smell generally persists for 2-4 weeks, depending on temperature, humidity, and the size of the mouse.
Using odor eliminators can significantly reduce this timeframe. Warmer temperatures will speed up decomposition but may temporarily intensify the odor.
Is mouse urine harmful to humans?
Yes, mouse urine can contain pathogens that cause several diseases, including hantavirus, leptospirosis, and salmonellosis. The urine also contains ammonia which can irritate the respiratory system, eyes, and skin with prolonged exposure.
According to the CDC, pathogens in dried urine can become airborne when disturbed, making proper cleaning protocols essential for safety.
What disinfectant kills mouse germs?
A solution of 10% household bleach (1 part bleach to 9 parts water) effectively kills most pathogens from mice. Commercial disinfectants labeled for use against viruses are also effective.
For sensitive surfaces where bleach cannot be used, a 70% alcohol solution provides good disinfection. Always allow disinfectants to remain wet on the surface for at least 5-10 minutes to ensure proper germ killing.
How can I tell if the mice are completely gone?
Signs that mice have been eliminated include: no new droppings appearing for 2-3 weeks, no sounds of scratching in walls or ceilings, no evidence of food being disturbed, and no mouse odors. Setting up “monitoring stations” with non-toxic tracking powder near suspected entry points can confirm whether mice are still active. In addition to monitoring for signs of activity, implementing preventative measures can further ensure a mouse-free environment. Some homeowners find success with the best homemade mice remedies, such as using peppermint oil or vinegar to deter mice from entering their spaces. Regularly sealing cracks and gaps around doors and windows will also help keep these pests at bay.
Continue monitoring for several weeks after you believe the problem is resolved, as mice can be temporarily inactive but still present.