Discovering bed bugs in your home can be overwhelming, but UV light bed bug detection offers a powerful advantage in the fight against these persistent pests. While UV light won’t kill bed bugs, it reveals their hidden locations by making their exoskeletons glow, allowing you to identify infestations early and target treatment efforts effectively.
Quick Picks: Best UV Lights for Bed Bug Detection

Editor’s Choice

Pro Choice
- How UV Light Detects Bed Bugs
- Safety Precautions for UV Light Use
- Step-by-Step UV Detection Process
- Effective Treatment Options After Detection
- Professional vs. DIY Treatment
- Prevention and Long-Term Monitoring
- When to Call Professionals
- Common UV Detection Mistakes
- Frequently Asked Questions
- Conclusion
How UV Light Detects Bed Bugs
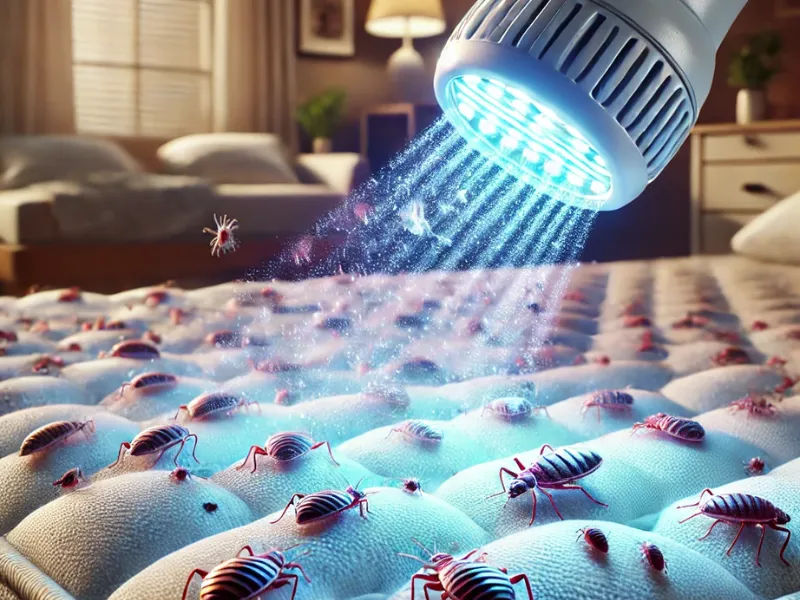
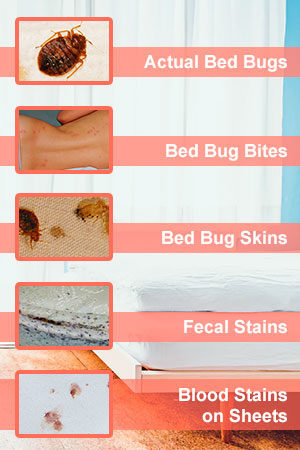
Bed bugs possess phosphors in their exoskeletons that absorb ultraviolet light and re-emit it as visible fluorescence. This natural phenomenon makes bed bugs, their eggs, shed skins, and fecal stains glow under UV illumination, revealing infestations that might otherwise go unnoticed.
Fluorescent Properties
Phosphors in bed bug exoskeletons absorb UV energy and emit visible light, making them glow in dark conditions.
Enhanced Visibility
UV detection reveals bed bugs, eggs, molted skins, and fecal stains that are nearly invisible under normal lighting.
Early Detection
Identifies infestations in their early stages, allowing for more effective and less costly treatment options.
Safety Precautions for UV Light Use
Before beginning your inspection, understanding proper UV light safety is crucial for protecting your health while conducting an effective search.
Step-by-Step UV Detection Process
Step 1: Prepare the Inspection Area
Proper preparation prevents bed bugs from escaping to new hiding spots during your inspection and ensures comprehensive coverage of potential harborage areas.

Seal loose items in bags

Move bed 6+ inches from walls
Block potential escape routes
Pre-Inspection Checklist:
- Place floor items in sealed plastic bags (books, clothing, electronics)
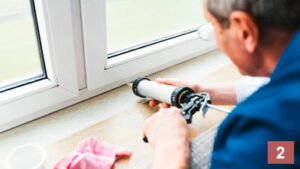
- Seal escape routes: wall cracks, electrical outlets, door/window gaps
- Remove all bedding and place in sealed bags
- Position bed at least 6 inches from all walls
- Schedule inspection for optimal times (midnight to 3 AM when bugs are most active)
Step 2: Systematic UV Inspection
Conduct a methodical examination using your UV light, focusing on areas where bed bugs commonly hide and travel.
Primary Inspection Zones:
Mattress & Box Spring
- Piping and seams along edges
- Under buttons and along zippers
- Divots and design folds
- Box spring fabric and frame joints
Furniture
- Bed frame joints and crevices
- Nightstand drawers and cracks
- Upholstered chair seams
- Picture frame backs
Room Features
- Carpet edges and seams
- Baseboards and molding
- Electrical outlet covers
- Curtain folds and rods
What to Look For Under UV Light:
| Evidence Type | Appearance Under UV | Significance | Location |
|---|---|---|---|
| Live Bed Bugs | Glowing reddish-brown bodies | Active infestation | Mattress seams, furniture joints |
| Molted Skins | Translucent glowing casings | Growing population | Hiding spots, feeding areas |
| Fecal Stains | Dark spots with fluorescent edges | Feeding and harborage sites | Mattress, nearby surfaces |
| Eggs | Pearl-white oval shapes | Breeding activity | Cracks, crevices, fabric seams |
Best UV Lights for Bed Bug Detection
GearLight UV Flashlight
Editor's ChoiceHow Does It Work
How to Use
- Insert 3 AAA batteries and test the device before inspection
- Darken the room completely for optimal results
- Hold the light 6-12 inches from surfaces being examined
- Move slowly across seams, joints, and potential hiding spots
- Look for glowing insects, eggs, or staining patterns
- 68 LEDs provide excellent coverage and intensity
- Compact size fits easily in tight spaces
- Durable aluminum construction
- Works for multiple pest detection applications
- Battery-powered for portability
- Requires 3 AAA batteries (not included)
- LED lifespan limited with heavy use
- May not penetrate deeply into thick fabrics
UV Optics Professional LED Ultraviolet Flashlight
Pro ChoiceHow Does It Work
How to Use
- Install 6 AA batteries for maximum runtime
- Wear included UV glasses for enhanced detection
- Use wrist strap to prevent drops during inspection
- Inspect systematically from top to bottom
- Document findings with regular lighting for verification
- Professional-grade intensity and coverage
- Includes UV protection glasses
- Heavy-duty wrist strap for security
- Longer battery life with 6 AA batteries
- Detects multiple pest types and biological evidence
- Heavier than compact models
- Higher battery cost with 6 AA requirement
- May be overpowered for small-scale inspections
Effective Treatment Options After Detection
Once UV inspection confirms a bed bug infestation, immediate action is crucial. These evidence-based treatment methods offer the highest success rates for elimination.
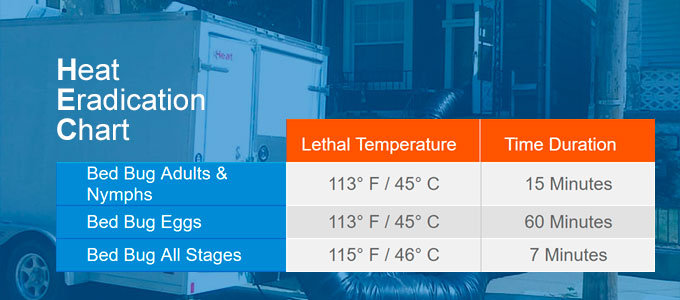
Heat Treatment Methods
Heat treatment remains the most effective approach for eliminating all life stages of bed bugs, from eggs to adults.
Heat Boxes
Specialized containers that maintain temperatures above 120°F (49°C) for sustained periods, killing all bed bug life stages without chemicals.
Steam Treatment
Professional or consumer steamers reach 200-400°F, providing instant kill on contact while penetrating fabric seams and crevices.
Freezing Method
Items sealed in bags and frozen at 0°F for 4 days eliminate bed bugs, ideal for delicate items that can’t withstand heat.
Integrated Management Approach
Professional vs. DIY Treatment
| Treatment Type | Effectiveness | Cost | Time Required | Best For |
|---|---|---|---|---|
| Professional Heat Treatment | 95-100% | $1,500-$4,000 | 1 day | Severe infestations |
| DIY Heat Boxes | 90-95% | $200-$500 | 1-2 weeks | Isolated items |
| Steam Treatment | 85-90% | $100-$300 | 2-4 weeks | Furniture/bedding |
| Chemical Treatment | 70-85% | $300-$1,200 | 4-8 weeks | Widespread infestations |
Prevention and Long-Term Monitoring
Successful bed bug management extends beyond initial treatment to include ongoing prevention and monitoring strategies.
Travel Prevention Tips
- Inspect hotel rooms with UV light before settling in
- Store luggage in bathroom tubs (hard surfaces) during stays
- Wash all travel clothes in hot water immediately upon return
- Vacuum and steam-clean luggage after each trip
Long-Term Monitoring Protocol
- Weekly UV Inspections: Continue UV light checks for 8-12 weeks post-treatment
- Interceptor Maintenance: Clean and monitor bed leg traps monthly
- Environmental Vigilance: Maintain clutter-free sleeping areas and sealed entry points
- Early Warning Signs: Watch for new bites, blood spots, or musty odors
- Documentation: Keep records of inspections and any evidence found
When to Call Professionals
While UV detection and some treatment methods are suitable for DIY approaches, certain situations require professional intervention.
Severe Infestations
Multiple rooms affected, heavy bed bug populations, or evidence in wall voids require professional-grade treatment equipment.
Treatment Failures
If DIY methods haven’t eliminated the infestation after 6-8 weeks, professional assessment can identify missed harborage areas.
Multi-Unit Buildings
Apartments and condos may have bed bugs traveling between units, requiring coordinated professional treatment.
Common UV Detection Mistakes
Frequently Asked Questions
Can UV light kill bed bugs directly?
UV light is not an effective method for killing bed bugs. While prolonged exposure (15+ minutes of concentrated UV) might kill individual insects, it’s impractical for treating infestations. UV light’s primary value is detection, not elimination.
For effective killing, use heat treatment, steam, or approved pesticides designed specifically for bed bugs.
Do all bed bugs glow under UV light?
Most bed bugs will exhibit some fluorescence under UV light due to phosphors in their exoskeletons, but the intensity can vary based on the bug’s age, feeding status, and the specific UV wavelength used.
Recently molted bugs may glow more brightly, while older adults might show less fluorescence. Always look for multiple types of evidence, not just live bugs.
What UV wavelength works best for bed bug detection?
UV lights in the 365-395 nanometer range work best for detecting bed bugs. This wavelength provides optimal fluorescence of bed bug exoskeletons while being readily available in consumer devices.
Avoid lights below 350nm or above 400nm, as they may be less effective or potentially more harmful to human exposure.
How long should a UV inspection take?
A thorough UV inspection of an average bedroom should take 2-3 hours minimum. This includes preparation time, systematic examination of all potential harborage areas, and documentation of findings.
Rushing the process significantly reduces detection accuracy and may leave infestations undetected.
Can UV detection find bed bug eggs?
Yes, bed bug eggs often appear as small, pearl-white oval shapes under UV light. However, eggs are tiny (about 1mm) and can be difficult to spot even with UV enhancement.
Look carefully in cracks, fabric seams, and crevices where female bed bugs typically lay their eggs. Use magnification if available for better identification.
Is UV inspection safe for daily use?
UV inspection is safe when proper precautions are followed, but it shouldn’t be used daily unless necessary. Limit direct skin exposure and never look directly at the UV light source.
For ongoing monitoring, weekly or bi-weekly UV inspections are sufficient after initial treatment, combined with interceptor traps and visual checks.
Conclusion
UV light detection represents a game-changing tool in the fight against bed bugs, revealing hidden infestations that might otherwise go unnoticed for weeks or months. When combined with systematic preparation, proper safety protocols, and evidence-based treatment methods, UV detection enables homeowners to take control of bed bug problems quickly and effectively.
Remember that detection is only the first step. Success depends on implementing comprehensive treatment strategies and maintaining vigilant monitoring to prevent re-infestation. Whether you choose DIY methods or professional treatment, early detection through UV inspection gives you the best chance of eliminating bed bugs before they become a major problem.