Carpenter bees can cause significant damage to wooden structures around your home. Instead of using harmful chemicals, carpenter bee traps offer an environmentally friendly and effective solution. This guide covers everything you need to know about selecting, building, and using carpenter bee traps to protect your property.
Quick Picks: Best Carpenter Bee Traps
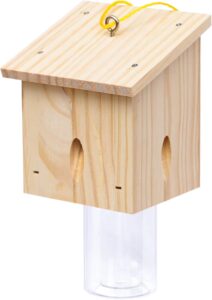
Editor’s Choice
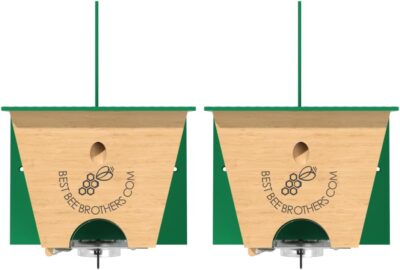
Most Innovative
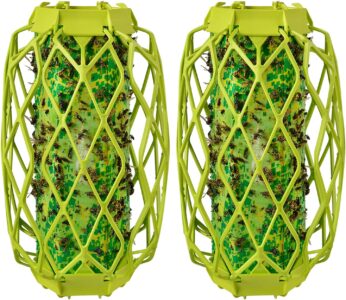
No-Wood Option
- Identifying Carpenter Bee Infestations
- How Carpenter Bee Traps Work
- DIY Carpenter Bee Trap Plans
- Commercial Carpenter Bee Traps
- Positioning Carpenter Bee Traps for Maximum Effectiveness
- Finding Carpenter Bee Traps at Hardware Stores
- Using Vinegar in Carpenter Bee Traps
- Prevention After Successful Trapping
- Trap Effectiveness Comparison
- Conclusion: Creating a Carpenter Bee Management Plan
- Frequently Asked Questions
- Further Reading
Identifying Carpenter Bee Infestations
Before purchasing or building traps, it’s important to confirm you’re dealing with carpenter bees and understand their behavior patterns.
| Signs of Carpenter Bee Activity | Description |
|---|---|
| Perfect circular holes | Look for perfectly round holes about the size of a pencil eraser (approximately 1/2 inch in diameter) in wooden surfaces |
| Sawdust piles | Fresh sawdust beneath the holes indicates active boring |
| Buzzing activity | Male carpenter bees hovering around wooden structures (especially in spring) |
| Staining | Yellow or brown staining beneath holes from bee waste |
| Common locations | Fascia boards, eaves, deck railings, wooden furniture, windowsills, and unpainted wooden surfaces |
While male carpenter bees may appear aggressive as they defend territory, they cannot sting. Only females have stingers, and they rarely sting unless directly handled or threatened.
How Carpenter Bee Traps Work
Carpenter bee traps exploit these insects’ natural behavior patterns to capture them without chemicals. When designed correctly, these traps can significantly reduce carpenter bee populations around your property.
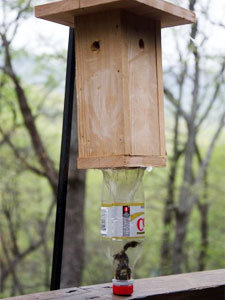
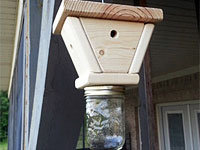
Common trap design showing entry hole and collection chamber
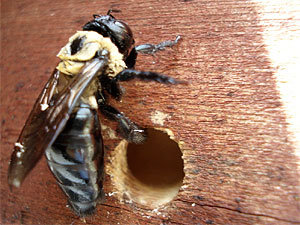
Carpenter bees entering trap through angled entrance hole
Captured carpenter bees in collection chamber
Attraction
Traps mimic the natural nesting sites of carpenter bees with wood materials and pre-drilled holes that appeal to their nesting instincts.
Entry
Bees enter through angled holes drilled in wood, thinking they’ve found a suitable nesting location.
Disorientation
Once inside, bees are drawn to light coming through the clear collection chamber while unable to find the entrance hole.
Containment
The smooth interior surfaces prevent bees from gaining traction, causing them to fall into the collection container where they become trapped.
DIY Carpenter Bee Trap Plans
Building your own carpenter bee trap is a cost-effective solution that requires minimal materials and woodworking skills. Here’s a simple design you can create at home:

Wooden Box Trap
- Uses untreated pine or cedar wood
- Simple box design with angled entry holes
- Clear plastic bottle collector
- No chemicals or attractants needed
- Can be painted or stained (except near entry holes)

Bottle Design Trap
- Uses recycled plastic bottles
- Small wooden entrance block
- Extremely low cost to build
- Lightweight and easy to hang
- Simple to empty and reuse
Basic Wooden Box Trap Instructions
To build a basic wooden box carpenter bee trap, you’ll need the following materials:
- 4-6 pieces of 1″ thick pine or cedar board (approximately 6″ x 8″)
- Clear plastic bottle
- Drill with 1/2″ bit
- Wood screws or nails
- Wood glue
- Saw
Follow these steps to build your trap:
- Cut your wood pieces to create a box approximately 6″ x 6″ x 8″ with one side left open
- Create an extended roof piece that’s larger than the box itself (approximately 8″ x 8″)
- Drill 1/2″ holes at 45-degree upward angles on each side of the box near the top
- Attach a clear plastic bottle to the bottom opening of the box
- Mount the trap near areas with carpenter bee activity
Bottle Design Trap Instructions
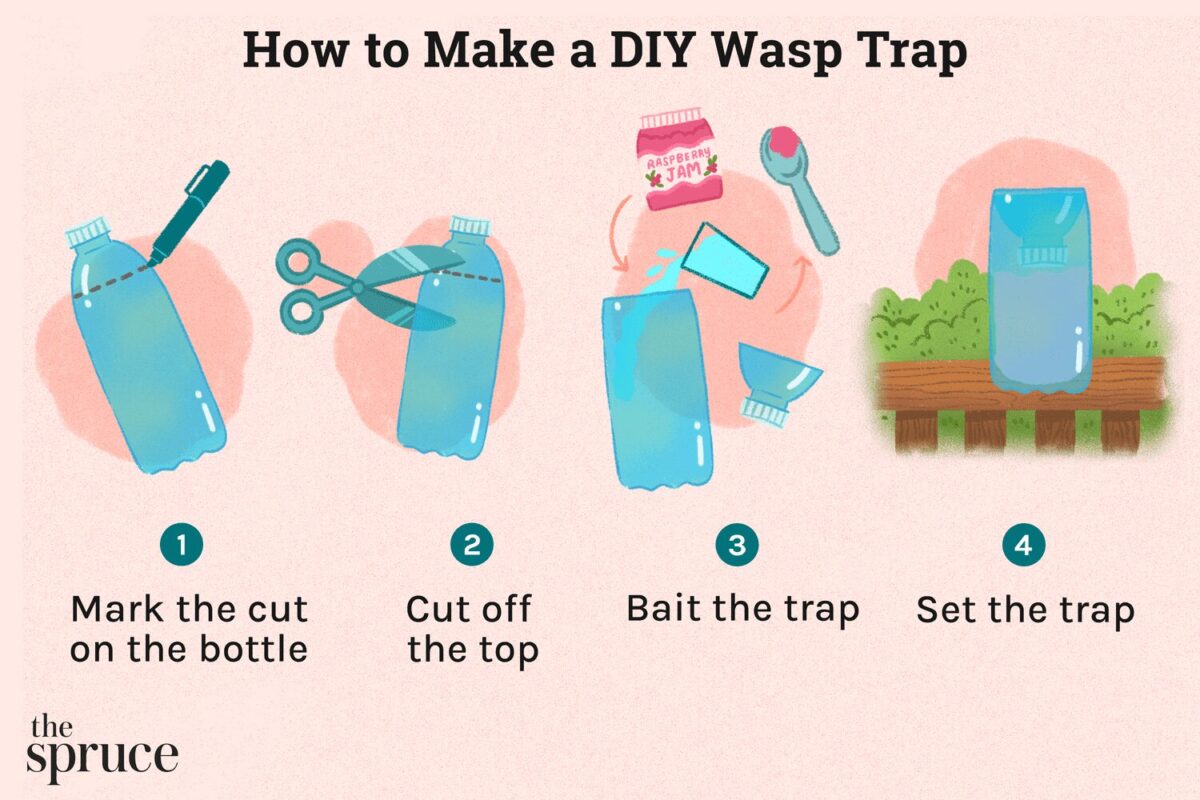
Complete step-by-step instructions can be found at The Spruce
Commercial Carpenter Bee Traps
If you prefer ready-made options, several commercial carpenter bee traps are available that offer reliability and professional design.
Best Bee Trap Pentroof Style
Editor's ChoiceHow Does It Work
How to Use
- Simply hang the trap in areas with carpenter bee activity (eaves, decks, wooden structures)
- No baiting or chemicals required - the natural wood is the attractant
- Monitor the removable vault to see captured bees
- Empty periodically by removing the vault component
- For best results, place traps before peak carpenter bee season begins
- Patented design proven effective against carpenter bees
- Made from weather-resistant natural cedar for durability
- Easy to install with simple hanging mechanism
- Environmentally friendly with no chemicals required
- Removable vault makes disposal simple and clean
- Higher initial cost than DIY solutions
- May need multiple traps for large properties
- Some setup time required
- Works best when positioned properly (may require adjustment)
Best Bee Brothers Turbo Trap 2.0
Most InnovativeHow Does It Work
How to Use
- Hang the trap near areas with carpenter bee activity
- Position at the recommended height of 5-7 feet above ground
- Monitor bee collection through the large viewport
- When ready to empty, simply pull the convenient 9-foot string to release the spring-loaded door
- For maximum effectiveness, install multiple traps around larger structures
- Innovative four-chamber Turbo funnel design for superior capture rates
- 20% larger capacity than previous models
- Touch-free disposal system with 9-foot pull string
- Large viewport for easy monitoring
- No chemicals or baits required
- Higher price point for a 2-pack
- Plastic construction may not blend as naturally with wooden structures
- Requires proper positioning for maximum effectiveness
RESCUE! VisiLure TrapStik
No-Wood OptionHow Does It Work
How to Use
- Remove the protective cover to expose the sticky surface
- Hang the trap in areas with carpenter bee or wasp activity
- Position away from high-traffic areas to avoid accidental contact
- Replace when the sticky surface becomes covered with insects
- Use from spring through fall for continuous protection
- Works on multiple pest types (carpenter bees, wasps, mud daubers)
- No wood components that could attract additional bees
- Odorless and chemical-free operation
- Made in the USA
- Affordable 2-pack option
- Limited capacity compared to chamber-style traps
- Needs replacement once filled
- Not as targeted for carpenter bees specifically
- Sticky surface can occasionally catch unintended targets
Positioning Carpenter Bee Traps for Maximum Effectiveness
The location and timing of your trap placement significantly impact its effectiveness. Follow these guidelines to maximize your capture rate:
Timing
Install traps in early spring (March-April) before carpenter bees begin nesting activities. This captures them before they can establish new galleries.
Sunlight
Place traps in sunny locations. Carpenter bees prefer sun-warmed wood, and sunlight helps illuminate the collection chamber, attracting trapped bees away from exits.
Height
Mount traps 5-7 feet above ground level, which matches the typical height where carpenter bees search for nesting sites on structures.
Proximity
Position traps near observed bee activity, previous damage sites, or vulnerable wooden structures, but not directly on the structures you’re trying to protect.
Check and empty traps regularly. A trap filled with dead bees is less effective and may deter new bees from entering. For heavy infestations, check traps weekly during peak season.
Finding Carpenter Bee Traps at Hardware Stores
Major hardware retailers like Home Depot and Lowe’s offer various carpenter bee trap options. Here’s what to look for when shopping:
| Store | Available Options | Price Range | Features to Look For |
|---|---|---|---|
| Home Depot | Pre-assembled wooden traps, DIY kits, bottle-style traps | $15-40 | Cedar construction, multiple entry holes, weatherproof designs |
| Lowe’s | Various commercial brands, seasonal availability | $20-35 | Extended roof designs, replaceable collection chambers |
| Ace Hardware | Locally made options, national brands | $15-30 | Starter kits with hanging hardware included |
| True Value | Basic models, seasonal stock | $12-25 | Simple designs, replacement parts |
Using Vinegar in Carpenter Bee Traps
While carpenter bee traps generally don’t require bait, some homeowners report success using vinegar as an attractant. Here’s how to incorporate vinegar into your trapping strategy:
Vinegar Trap Enhancement Tips
- Add 2-3 tablespoons of apple cider vinegar to the collection chamber
- Mix vinegar with a small amount of sugar (1 teaspoon) to increase attractiveness
- Replace the vinegar solution weekly to maintain effectiveness
- Position vinegar-enhanced traps in shaded areas where the scent will disperse gradually
- For stronger attraction, add a few drops of lemon essential oil to the vinegar mixture
Prevention After Successful Trapping
After reducing the carpenter bee population with traps, implement these preventive measures to discourage future infestations:
- Paint or finish exposed wood
Carpenter bees strongly prefer bare, unfinished wood. Apply paint, polyurethane, or varnish to all exposed wooden surfaces, especially softer woods like pine, cedar, and redwood. - Seal existing holes
Fill existing carpenter bee holes with wood putty, caulk, or wood dowels and wood glue. Sand and paint over the repairs to prevent bees from detecting previous nesting sites. - Replace damaged wood
Remove and replace severely damaged wood with treated lumber that resists carpenter bee infestation. - Maintain traps year-round
Keep traps in place even after activity decreases to catch any returning bees and prevent reinfestation. - Consider structural alternatives
For areas with persistent problems, consider replacing wooden elements with composite materials, vinyl, or aluminum that carpenter bees cannot nest in.
Never seal holes while bees are actively nesting inside! This can force bees to create new exit holes in your wood or trap developing bees that may emerge later. Seal holes in late fall or winter when bees are dormant or after confirming the gallery is vacant.
Trap Effectiveness Comparison
Different trap designs offer varying levels of effectiveness depending on your specific situation:
| Trap Type | Capture Rate | Durability | Maintenance | Best For |
|---|---|---|---|---|
| Wooden Box Design | High | 3-5 years | Moderate (seasonal) | Large infestations, primary structures |
| Bottle Design | Moderate | 1-2 years | Low (easy to replace) | Budget solutions, multiple locations |
| Multi-Chamber Professional | Very High | 5+ years | Low (durable materials) | Persistent infestations, valuable structures |
| Vinegar-Enhanced | Moderate-High | Varies by base design | High (weekly refreshing) | Supplementary to other control methods |
For complete carpenter bee control, combine trapping with preventive measures like painting and sealing wooden surfaces. Traps alone will reduce populations but won’t eliminate the problem entirely if attractive nesting sites remain available.
Conclusion: Creating a Carpenter Bee Management Plan
Successful carpenter bee management requires an integrated approach rather than relying solely on traps. Here’s a comprehensive strategy for long-term protection:
- Deploy appropriate traps in early spring before nesting season begins
- Regularly inspect your property for signs of new carpenter bee activity
- Apply preventive treatments to vulnerable wooden surfaces
- Seal existing holes after confirming they’re no longer active
- Maintain and clean traps throughout the active season
By combining these methods, you can effectively control carpenter bee populations while preserving the structural integrity of your home and outdoor wooden features. Remember that carpenter bee control is typically an ongoing process rather than a one-time solution, particularly in areas where these bees are native and abundant.
Frequently Asked Questions
Do carpenter bee traps really work?
Yes, carpenter bee traps can be highly effective when properly designed and positioned. Research and user experiences confirm that well-made traps can capture significant numbers of carpenter bees, especially in early spring before they establish nests.
The best traps mimic the bees’ natural nesting preferences with untreated wood and proper hole dimensions, positioned in sunny locations near existing bee activity. However, traps should be considered one component of a comprehensive carpenter bee management strategy that also includes preventive measures.
What attracts carpenter bees to traps?
Carpenter bees are primarily attracted to traps by:
- Untreated, soft woods (pine, cedar, redwood)
- Properly sized entrance holes (typically 1/2 inch diameter)
- Angled entrance holes similar to their natural tunnels
- Light-colored or natural wood finishes
- Sunny, protected locations near existing wooden structures
- Extended roof overhangs that allow bees to drill upward
Unlike many insect traps, carpenter bee traps generally don’t require chemical attractants or baits—the wood itself serves as the primary lure.
When is the best time to set carpenter bee traps?
The optimal time to set carpenter bee traps is in early spring (March-April in most regions), before the bees become active and start establishing nests. This timing allows you to:
- Capture overwintered adult bees emerging from hibernation
- Intercept bees before they create new tunnels in your structures
- Reduce the population before breeding season begins
- Prevent the establishment of new generations
- Minimize structural damage to your property
For ongoing protection, maintain traps throughout the warm months and consider reinstalling them in early fall when some carpenter bee species have a second activity period.
How do I know if I have carpenter bees or another type of bee?
You can identify carpenter bees by these distinctive characteristics:
- Size: Large bees approximately 1/2 to 1 inch long
- Appearance: Shiny, black abdomen with little or no hair (unlike fuzzy bumblebees)
- Behavior: Hovering near wood structures, particularly males defending territory
- Evidence: Perfect round holes approximately 1/2 inch in diameter in wood
- Debris: Fine sawdust beneath holes where they’re actively boring
Carpenter bees are often confused with bumblebees, but bumblebees have yellow markings and fuzzy abdomens, nest in the ground or in debris piles, and don’t drill into wood.
Do carpenter bee traps kill the bees?
Most carpenter bee traps are designed to capture and contain the bees rather than kill them instantly. Once trapped, the bees eventually die from dehydration or starvation inside the collection chamber. Some trap designs allow for the release of captured bees in remote locations, though this is less common.
If you’re concerned about bee conservation, remember that carpenter bees are not endangered, and unlike honeybees or bumblebees, they’re not significant crop pollinators. Their wood-boring behavior can cause substantial structural damage to homes and wooden structures, making targeted control necessary in many situations.
How close should traps be to carpenter bee holes?
For optimal effectiveness, position carpenter bee traps:
- Within 10-15 feet of existing carpenter bee activity or damage
- Away from but near vulnerable wooden structures you want to protect
- At a similar height to observed bee activity (typically 5-7 feet above ground)
- In sunny locations with good visibility
- Not directly on the damaged wood itself (which could attract more bees to that area)
Using multiple traps spaced around your property creates a perimeter of protection, intercepting bees before they reach your valuable wooden structures.
Can I make a carpenter bee trap with vinegar?
While traditional carpenter bee traps rely primarily on wood as the attractant, some homeowners report enhanced results by adding apple cider vinegar as a supplementary lure. To incorporate vinegar:
- Add 2-3 tablespoons of apple cider vinegar to the collection chamber
- Mix with 1 teaspoon of sugar to increase attractiveness
- Replace the solution weekly to maintain effectiveness
- Consider adding a few drops of lemon essential oil to enhance the scent
However, vinegar alone in a container is unlikely to be effective—the primary attractant should still be the wooden structure of the trap that mimics their natural nesting sites.
How many carpenter bee traps do I need?
The number of traps needed depends on several factors:
- For small structures (shed, small deck): 1-2 traps
- For average homes: 3-4 traps positioned around the perimeter
- For large properties with multiple structures: 5+ traps
- For severe infestations: 1 trap per 200-300 square feet of vulnerable wooden area
- For preventive use in low-infestation areas: 2-3 traps as a minimum
Strategic placement is often more important than quantity. Position traps near previous damage sites, in sunny locations, and at the proper height for maximum effectiveness.
Further Reading
For more information about carpenter bees and their control, consult these authoritative resources:
- University of Maryland Extension: Carpenter Bees – Information about carpenter bee biology and their role as pollinators
- Clemson University: Carpenter Bee Management – Expert guidance on identification and control methods
- University of Georgia Extension: Are Carpenter Bees Damaging Your House? – Information about carpenter bee damage and chemical control options
- NC State Extension: Carpenter Bees Spring Into Action – Expert information about prevention and treatment


To plug the holes i use a 3/8 inch dowel for. I slightly tapered the end on my grinder then cut it off about 1/2 inch long. When you tap it in, it is perfectly flush.
I feel like I’m attracting more bees than I originally had. Is this possible that the scent of the bees in the trap are attracting more than I originally had? Feels like they are having a family reunion on my front porch deck and they are calling their 2nd or 3rd cousins to the party.
No comments seem to address my issue. Log home central TN. Carpenter Bees by the hundreds. No use to catch 15-20 in a trap. Traps ineffectual…spray in holes within reach and they just migrate farther up. Professional exterminators never show up with equipment to truly address the problem. If someone comes up with a solution, they’d be rich! I’d pay big to get rid of these destructive pests on my beautiful log home. I’d rather have snakes!
This guy uses bee butter to kill them. It looks pretty effective and he says it lasts a long while. If I had a cabin, I would get this stuff. Luckily, they are just annoying me on my deck, so I can use the traps.
We bought one of the wood and plastic jar traps from Amazon last year. After a couple of weeks without catching one, I talked to our pest company to come out and exterminate the existing holes. The exterminator informed me how aggressive carpenter bees are, and are attracted to the scent of other dead carpenter bees.
We decided to give it a try. I smacked one with a tennis racket, and put it’s body in the plastic bottle. By the end of the next day, we had a live one trapped in there. By the end of the week, the bottle was 1/2 full.
I live in FLA and with the warm temps and early start to spring this year saw them hovering early. I built a simple one out of pine and within 3 days had caught 13 of them. They seemed to have tapered off since then. The wd 40 works great at getting them out.
Thought you would all like to know that wd-40 works the best. Spray in the holes, kills the larvae. Spray the wood and the bees won’t go near it.also kills the big ones almost on contact.
Do you put liquid in trap jar?
Get an electric flyswatter from Harbour Freight and have a good time. You might have to kill them when they hit the ground but it will stun them long enough.
Bait with a spoon or two of Dawn dishwashing soap and mostly some sweet drink like Apple Cider, Dr Pepper, or Mountain Dew. Only a couple of inches deep so they can drown in it when they get too tired and soapy to fly.
It’s now mid July and I haven’t seen the little buggers for a couple weeks. Should I still put out my newly purchased trap or wait til next spring?
I just built a lakehouse and found three holes in my new deck. I bought and hung two carpenter bee traps and have had them up for about a month and so far they have no interest in them. Any suggestions?
We built one with the jar at the bottom. Finally, after two months, we trapped our first carpenter bee. It stewed in the jar for a few hours and then out of nowhere it was gone….why….any ideas on how to keep them in there?
I made a trap from instructions on line and caught nothing (square box with hole and jar on bottom). They are really bad this year and destroying my log home which is stained–apparently that is NOT a deterrent.
Fill the clear container with some mineral oil to speed up their demise
I was told when I bought my trap to catch/kill a bee and put it in collection jar this would attract more bees. Works for me, after putting in jar starts filling. Mine is made of cedar, bought at flea market.
No my traps have a jar on the side. Took just a few minutes but I watched 3 go in and then get out of the trap!
Done use side jars. Use the ones with jars or bottles on the bottom.
Sorry about carpenter bees escaping your trap. Since the jar is mounted on the side of the trap, that points to a poorly designed trap. The jar should always be mounted on the bottom.
What mixture are getting put into the trap jars to attract them? I do t want to attract more but I want them to know to go the heck in! Lol. I have 2 plastic bottle traps and 1 wood carpenter bee trap. And they have been up for a week with sweet smells inside but no luck. What do I do!? I have bumble bees and carpenter bees and wasps all around where I leave my front porch. I can’t even enjoy my yard. Help!!
Wherever they are swarming, in my case they are around my sheds, hang up your traps. Because of the design of the hole, which is at a 45 degree angle, they will be tempted to go in. With the bottle on the bottom, they will fall into the bottom and remain there until they die. Because there is already one in there, soon others will follow. No need for any attractive. I have never used any and have no problem catching any.
I just put my 2 traps out. Got one in each trap right away. But they aren’t there now! They got out! How can I prevent this? Please help!!!
Does your trap have a glass jar at the bottom? Once the bees get into that jar, they are not bright enough to know that they have to fly upward through the hole in the jar lid into the dark wooden box. And then crawl through one of the holes if they can see them.
I went to Home Depot none there but a silicon spray for plugging holes. Now for a high enough ladder! Went to local Co-op and purchased three. Set up and while waiting used the tennis racket method, two down! How many to go?! Might try the putting the squished ones in the traps to get working! They think they own my humming bird feeders! And they do run ( fly away) when wielding the racket!
These bees are like flying aces and when you step on them they don’t die, Got to be smooched. dammit!!!
Who is the MORON who wrote this:
“insert a vacuum cleaner hose into the hole”
The HOLE is about 3/8″ diameter, how will you put a VACUUM CLEANER HOSE in it?
” They are surprisingly perfect circles of the size of a pencil eraser.
“
Thanks for the comment about the MORON who suggested using a vacuum cleaner inserted into the 3/8″ hole.
After a few seasons of tracking, correcting and removal it appears under control. Autumn will signal success or not.
Can the bees get out? Maybe I should ask if the Queen Bees can bore her way out?
I use sugar water for initial attraction, so when the bee goes in, they drown. Queen entered quickly and what appeared to be drones (smaller) joined. I watched the Q paddling to get out. She didn’t. More traps going up.
what do you use to plug holes in your house
We used wads of steel wool from the hardware store. One year, I used silly putty & chewed bubble gum. Stylish!
Find the traps at your local farmers co-op
Thank you all! I have a great trap bought at a local arts in the heart of Augusta Ga! Looks like a bird house with holes, & a mason jar at the bottom! I like some of u exclaimed hung it & caught my 1st bee in less than 5 minutes! He got out my fault,I leaned it over& he crawled out! Moved it back & boom another! But I want to catch them like BOOM! BOOM! BOOM! Lol! Pheromones! Great idea! I started thinking like ants they communicate to run! So I’m gonna swat, insert, & see! Wish me luck!!!
To speed up the entry process for these darlings, get your badminton racquet out and take a stationary moment where they fly by. easy to knock down,and locate, prime the bottle with a few. The pheromones will attract other local residents-to-be. Its also great sport and good for eye-hand coordination. They do learn to avoid if you miss them
By the way, if you had a caprenter bee problem in the spring and did not take action to control them, they are not gone. The female and developing larvae are now inside the wood and will begin to emerge in the next few weeks. If you have installed bee traps, watch them and you will begin to see new activity in the traps.
I made 2 traps the first from old pine I had laying around, the second out of some red cedar I also had. Caught the first bee in the pine trap in 45 min. the cedar one had 3 in it in 24 hours. so I am going to start making some and sell them at the community garage sale in a couple of weeks. Oh I also used no attractant, I don’t want to bring anymore in with it, I just want the ones here gone.
It has come to my attention that this apparently has a patent on it and have been contacted by the patent owner and have quit selling these to anyone other than friends and family. Thank you and sorry, They are really easy to make if you look up the plans.
Thanks Brian Judge
I have about 5 and they work great, 3 of the jars are already half full. It takes a while to get one to use it but once you have caught one they seem to use it more readily. I think the smells (I forget the word for them) from the first one make the rest more comfortable. Mine are from Amazon, I ordered one and it was junk from china but I tried another seller and it was a very nice trap so I got more. The company with the nice trap said uncle dunkel on the shipping label, I think that was the seller name too if I remember correctly.
I think I found mine on Amazon. FYI, this year they worked even better than last year.
They like the heat. 90 here today and have four in them. The key is getting them up early and plugging holes in fall. They will go to old hole first. If the trap is the only option you’ll catch more.
Where can I purchase a good pre-made trap? Tried local Home Depot …..nothing. Anything on-line?
Thanks
Ace Hardware… Lowes
We’ve had these pests for years and I was really skeptical about these traps. I went ahead and made one (only took about 15 minutes) and it just hung there for about a month with no results. I went out of town for a few days and when we returned there were about 15 bees inside. I immediately made about 5 or 6 more for not just me, but for my friends too.
is there anything I can put on trap to draw them to it
I have one- the wood is what attracts the carpenter bee’s- I’ve already got about 20 in there from this year. Last yr the cup was full before I emptied it out. This year – I am going to make some. The one I’ve had hanging I bought at a home show- I googled it & there are enough diy’s to make one easy…
Is there an attractant that make the bee trap work
is there an attractment for carpenter bees,to a trap?
Did you ever get an answer? Would love to hear it!
Sure. Knock one down with a Tennis or Badminton racket (try to stun it and not kill) and put it in the jar. It will release pheromones that will attract other bees.
I have had carpenter bee traps for about 4 years. In one of the traps there is a bee who built a nest inside the the trap. The bee is still alive and the nest covers pretty much the whole trap. When those bees hatch will they all die in the trap also? Is the bee that built the nest a queen?
Thank You
EiLeen
How long does it take before I catch my first carpenter bee in my trap
It took 2-3 weeks for mine to start working.
The longer you have the traps the more bees you will catch. I have had mine for at least 4 years. They seem to like seasoned wood. I didn’t catch that many when the traps were first put out.
You are quite right. I put out 4 jar traps this year. One made last year with seasoned wood. Three of them I just built with fresh white pine. Guess what? I have caught 7 bees so far in the seasoned trap. None yet in the new ones. Question: How do I make the new traps look “seasoned” ? Or smell seasoned?
I just bought one last night and I’d say within the hour I already got one.